
It is important to ensure website security with SSL (Secure Socket Layer). It helps you protect customers’ sensitive information as they interact with your site and perform tasks such as browsing web pages, submitting forms, and conducting financial transactions.
SSL certificates work by encrypting the data exchanged between a user’s browser and a web server. This ensures that sensitive customer information like contact details and credit card details remain secure.
The benefits of SSL extend far beyond sensitive data security. Search engines like Google, recognizing the importance of protecting personal details, give preference to websites with SSL in their rankings. A secure website with SSL can rank higher, leading to increased visibility and organic traffic.
This article provides a comprehensive guide to installing a free Hostinger SSL certificate on your website. We’ll also explore other ways to obtain an SSL certificate and share solutions for common SSL errors.
How to Get SSL Certificate Using hPanel
First, let’s discuss how to get a free SSL certificate to strengthen your web hosting security. Hostinger offers users free SSL certificates for web hosting, cloud hosting, and Hostinger website builder plans.
Our system automatically setups an SSL certificate, providing encryption to your website as soon as it is added to your hosting plan.
The automated process eliminates the need for manual installation or upgrade. We handle it all for you, ensuring peace of mind.
If free SSL certificate renewal or installation does not happen automatically, you can manually obtain SSL for a website through HPanel by following these easy steps:
1. Verify Domain and Access hPanel
Make sure your domain is added to your Hostinger hosting plan. If you plan to use a subdomain, create and add it to your hosting plan from hPanel.
Here’s how to do it:
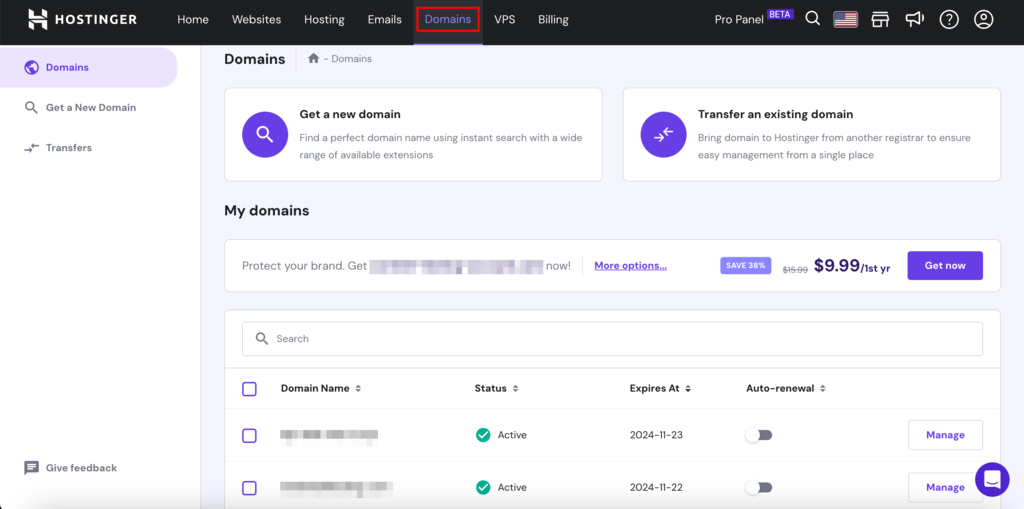
Perform Domain Verification
Log in to your HPanel, go to the Domains section, and scroll down to the My Domains tab. Here, you’ll find a list of all your domains, including domains purchased through Hostinger and any external domains added to your hosting plan.
Create a Subdomain
If you plan to use a subdomain for your website, follow these steps on hPanel:
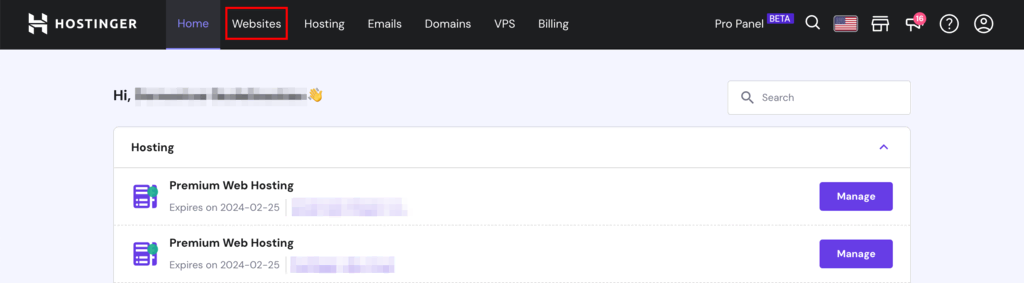
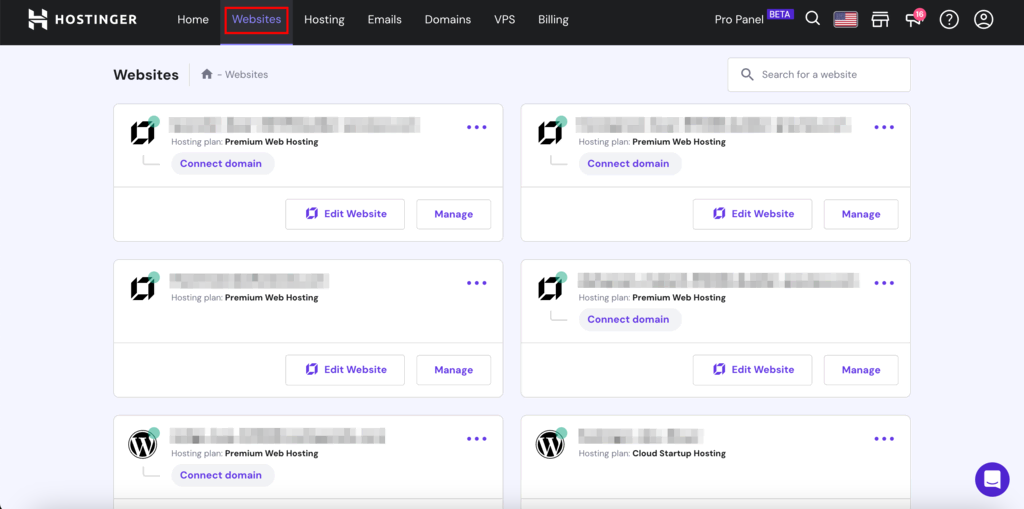
- Navigate to the Websites section.
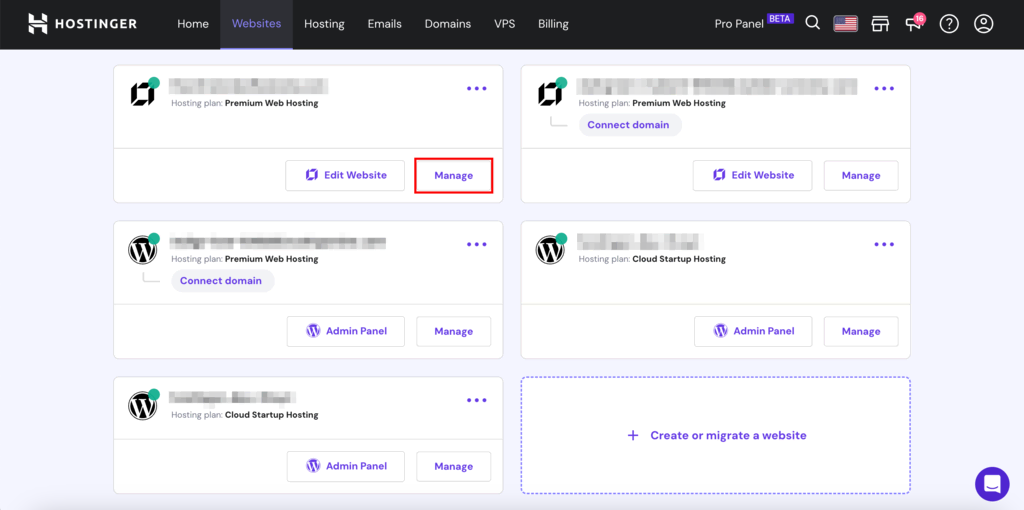
- Click Manage next to the website for which you intend to create a subdomain.
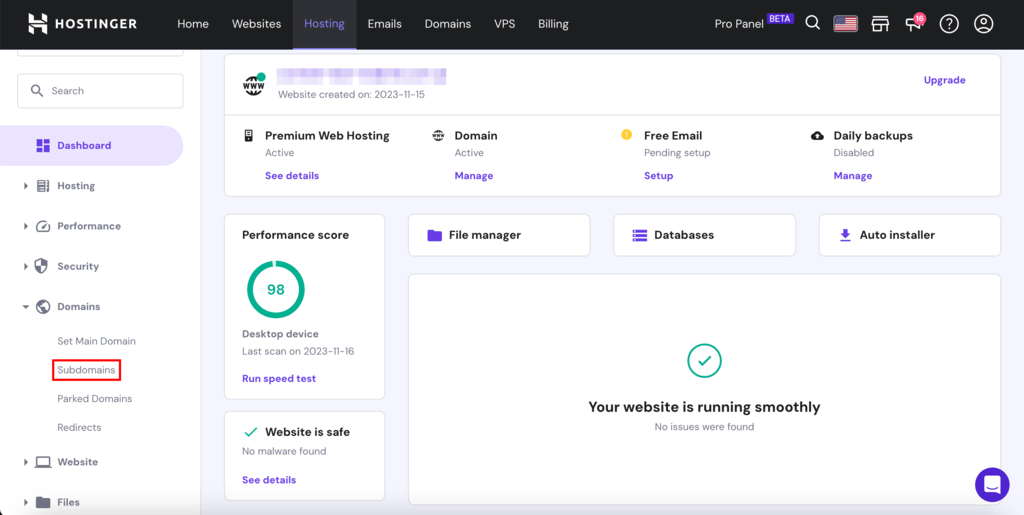
- Next, click on Domains → Subdomains on the left sidebar.
- In the Create a New Subdomain section, enter the desired name for your subdomain.
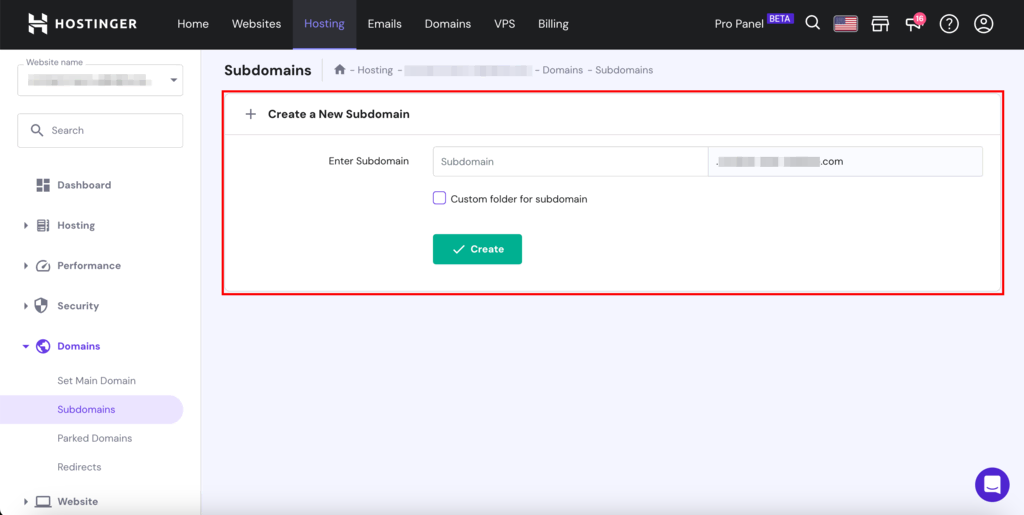
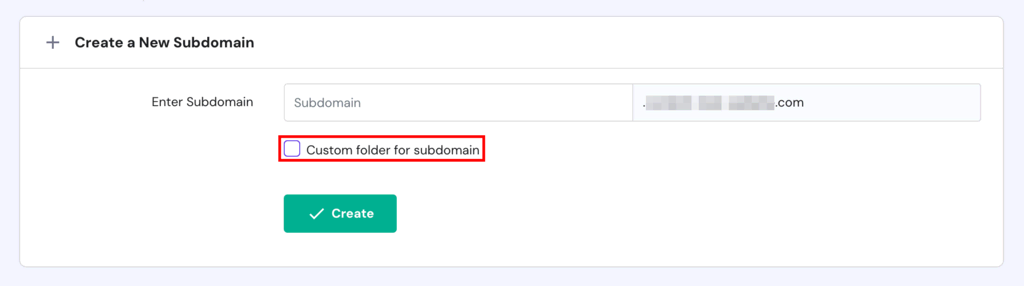
- You have the option to create a custom folder for the subdomain. However, we recommended keeping the default directory for ease of management.
- Once you’ve entered the subdomain name and decided on the directory, click Create.
You can repeat these steps to create multiple subdomains for your website.
Pro Tip
To secure multiple domains or subdomains with SSL, you can use wildcard certificates. Visit our other tutorials to learn more about the different types of SSL certificates.
2. Navigate to Website Settings
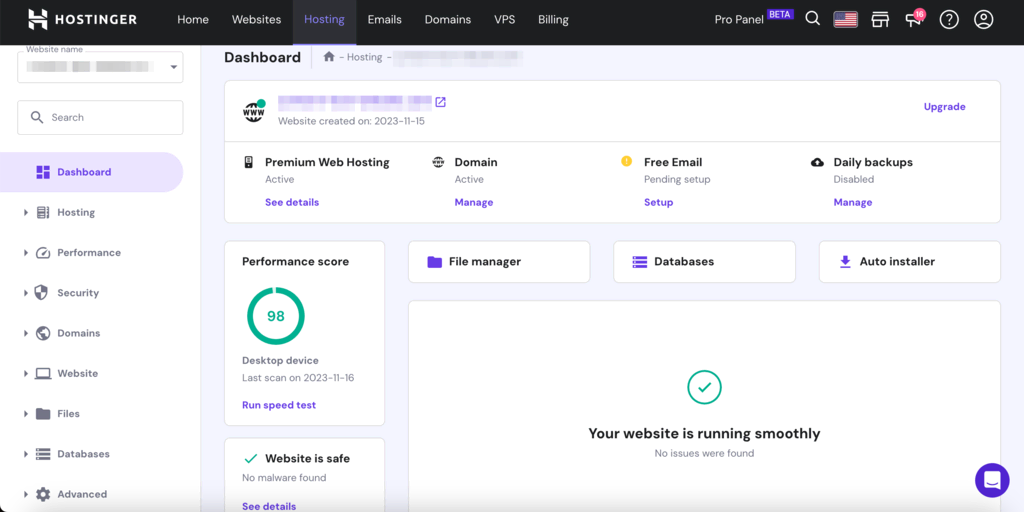
Go to the Website section in hPanel. Here, you will find a list of all the sites hosted under your account. This area allows you to manage various aspects of your website, including editing the website design and managing hosting.
3. Select the Website to Install SSL
Locate the website for which you want to perform manual SSL certificate installation and click Manage. This action will take you to the site’s hPanel dashboard.
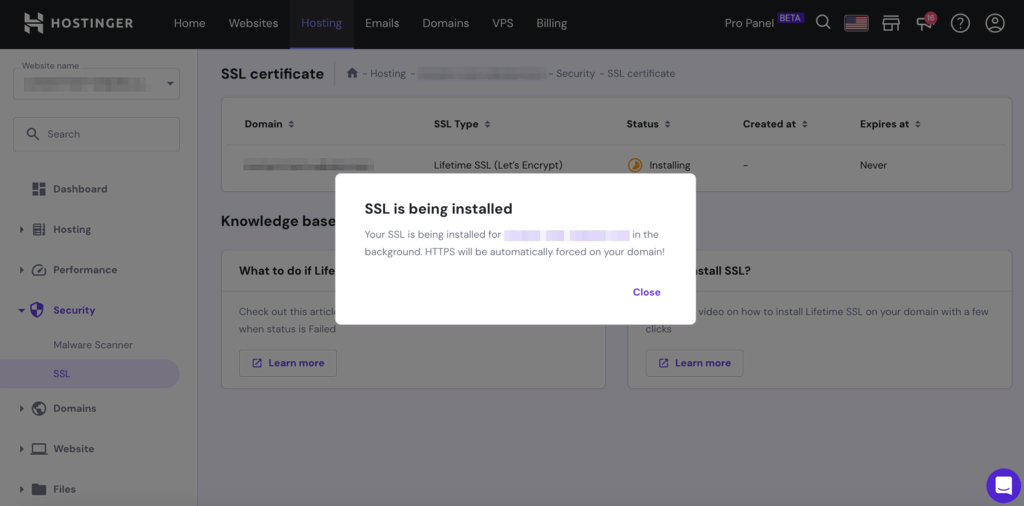
4. Initiate SSL Installation
From the dashboard, go to the Security tab and click SSL on the left sidebar. Here, select the primary domain name from the dropdown list and click Install SSL. This will manually install your free SSL certificate.

A pop-up notification will inform you that the certificate is being installed.
5. Check for SSL Options
If you don’t see the Import SSL or Install SSL option, chances are you already have an SSL certificate installed on that domain. Instead the section will show you the certificate details, including its SSL type, creation date, expiration date, and status.

6. Verify SSL Status
If you get a free SSL certificate for your website, it’s important to make sure it is installed and functioning properly. The activation time frame for an SSL certificate depends on a variety of factors, including the type of hosting plan you have and the specific certificate authority (CA) used.
Check these factors to make sure your website’s encrypted connection is working properly:
- Open your website using different web browsers. Look for the lock icon in the address bar – this indicates that SSL authentication is active.
- Make sure your website’s URL contains https://. The s in https means secure, and its presence indicates that the security protocol is in place.

- Inspect the certificate details by clicking on the padlock icon → Connection is secure → Certificate is valid. It provides information about the certificate issuer, validity period, and domains covered.

- Check the status of your certificate using an SSL checker tool like SSL Shopper. Simply enter the URL of your website, and it will verify the validity of the certificate.
How to Get an SSL Certificate
You can also obtain an SSL certificate for a website by purchasing it directly from a Certificate Authority (CA).
Here’s how you can do it:
Choose a Certificate Authority
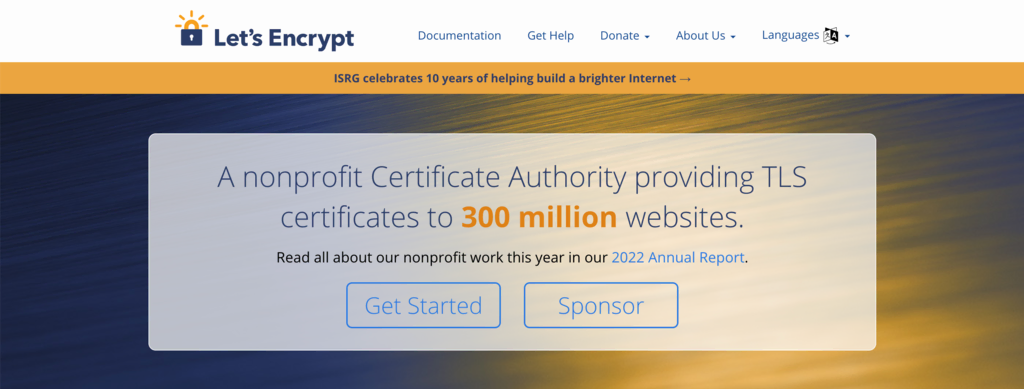
It is important to purchase your certificate from reputable certificate authorities such as Let’s Encrypt, Comodo SSL, or DigiCert.
The cost of an SSL certificate can vary depending on the number of domains covered, the type, and the issuing authority. Make sure you consider all of these factors when selecting an issuer.
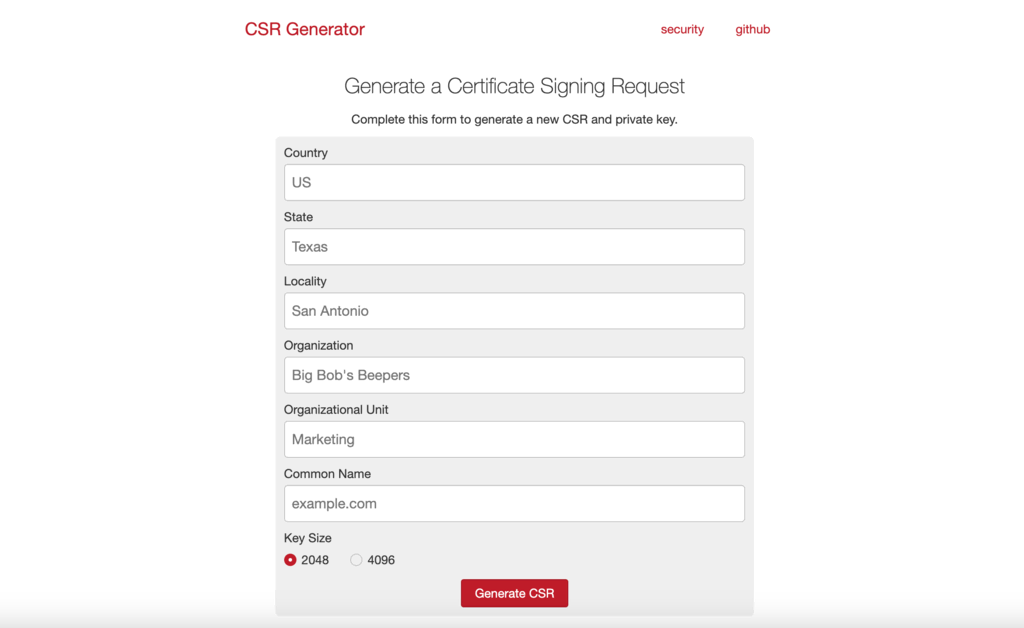
Generate a Certificate Signing Request (CSR)
Certificate signing request (CSR) is a file that contains essential information about a website and its owner. This file is required for the SSL certificate process.
You can generate a CSR file through your web hosting provider’s control panel or by using a dedicated CSR generation tool such as CSR Generator.
Validate Domain Ownership
CAs may require owners to verify ownership before issuing an SSL certificate for a domain. This process involves verifying your authority over the domain’s DNS records or the associated email address.
The DNS method involves adding a specific TXT record generated by the CA to your domain’s DNS zone. This record contains a unique code that lets the CA verify your ownership when it accesses your domain’s DNS records.
For email verification, CA sends a verification link or code to the email address associated with your domain. To confirm your ownership, click the link or enter the code provided.
Submit Certificate Signing Request to the Issuing Authority
After verifying your domain ownership, you must submit the CSR file to CA. After this the authority will review your application and if everything is fine then issue the SSL certificate.
Install SSL Certificate
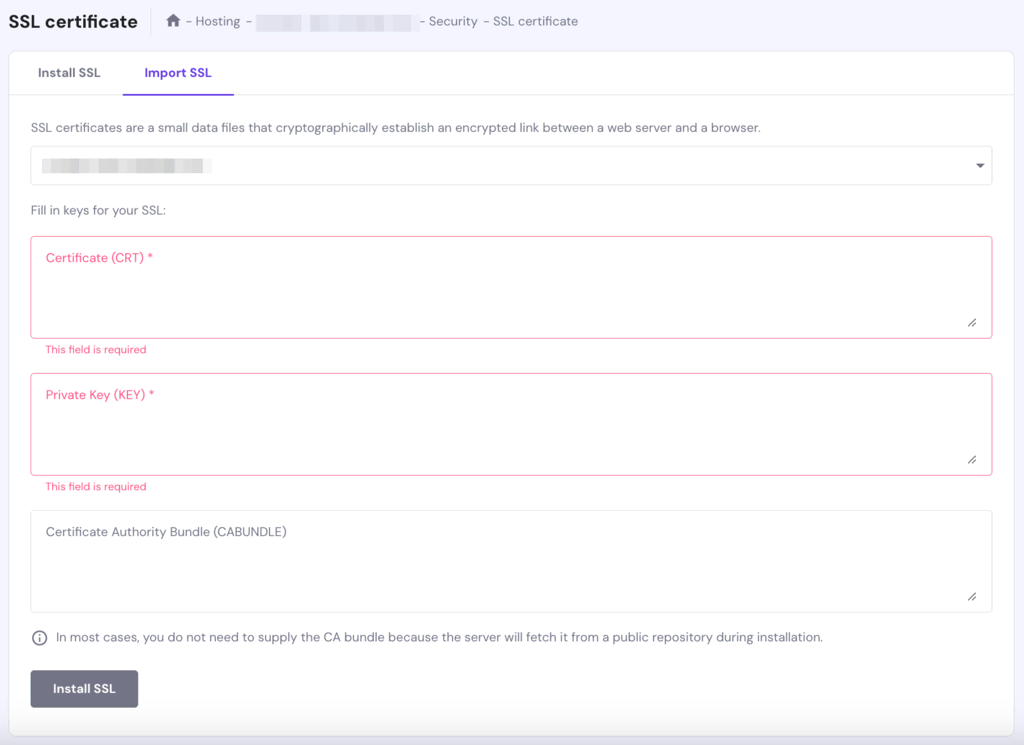
Once you have received your SSL certificate and its associated private key, the next step is to install it on your website through your web host. Many web hosting services have a dedicated section for importing certificates. This option is usually located in the SSL settings of Control Panel.
With Hostinger HPanel, you can find this option at Security→SSL→Import SSL. Here, enter your certificate details, including its public key, private key, and certificate authority bundle, to install your certificate.
Important! SSL certificate activation may take some time, as changes may need a few hours to propagate online.
Renew SSL Certificate
All certificates have a limited lifespan, usually lasting one to two years. To keep your website’s data encrypted and secure, you need to renew its SSL before it expires. Most CAs send SSL certificate renewal reminders a month before the expiration date.
To renew, you will need to generate a new CSR, reconfirm your domain ownership, submit a renewal request, pay the renewal fee, and install the new certificate through your hosting service once it is issued. will be.
Troubleshooting SSL Installation
If you encounter issues during the installation process, here are some solutions you can try:
- Clear your browser’s history and cache. Alternatively, access the website using incognito mode to bypass cache issues.
- Temporarily disable your device’s antivirus or firewall. They can sometimes interfere with SSL connections.
- Ensure that your domain is correctly pointing to Hostinger nameservers. Incorrect DNS settings can lead to SSL installation failures.
- Wait for the DNS records to fully propagate after you make any changes to your DNS settings. This process can take up to 48 hours. During this time, your SSL certificate might not function correctly.
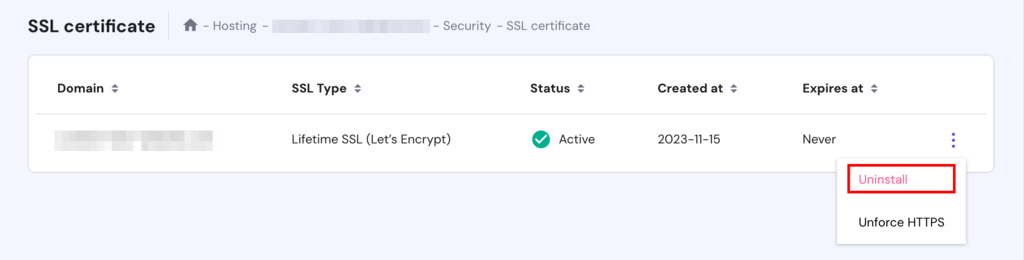
- Perform an SSL certificate validation check using SSL checkers. If it indicates your SSL is invalid, contact your SSL issuer. If you’re using the SSL provided by your hosting company, try uninstalling and reinstalling the certificate.
With HPanel, you can do this by navigating to the SSL Certificates section. Here, click on the three dots menu for more options and select Uninstall.
If you still encounter any issues with the activation process, contact Hostinger’s Customer Success team for assistance.
For additional help regarding SSL certificate errors, watch our video tutorial, which provides more SSL certificate troubleshooting options.
Conclusion
SSL certificate configuration is an important web hosting security measure to ensure a secure online presence. It helps all types of sites from small business websites to ecommerce stores, protecting sensitive information and promoting customer trust.
Ensuring the security of your website is simple and effective with the right approach and knowledge. Whether you get free SSL from Hostinger or purchase it from a certificate authority, the goal is to provide a secure online environment for visitors.
Hostinger makes website security more convenient by providing free unlimited SSL certificates with web hosting, cloud hosting, and Hostinger website builder plans. While our automated installation provides convenience, manual installation is equally intuitive and user-friendly if you decide to purchase an SSL certificate from a third party.
How to Get an SSL Certificate FAQ
In this section, we will cover some frequently asked questions about how to get an SSL certificate for online businesses.
Does Hostinger Provide Free SSL Certificates for All Hosting Plans?
Hostinger offers free SSL certificates with its web hosting, cloud hosting, and Hostinger website builder plans. However, free SSL is not included in our VPS hosting plans.
How Do I Know if My SSL Certificate Was Installed Automatically?
To check if your SSL certificate is automatically installed, visit your website and look for the padlock icon in the browser address bar. Click the icon to view certificate details and select the Connection is secure option. Alternatively, you can log in to your Hostinger account and access HPanel for SSL status updates.
Can I Reuse SSL Certificates on Different Websites?
No, each site usually requires its own SSL certificate to establish a secure connection and ensure data encryption, and you cannot transfer them between different websites.