
Hosting your own Rust server can be a rewarding experience, giving you complete control over the game world and its settings. However, it can also be a bit daunting for beginners. This guide will walk you through the process step-by-step, making it as easy as possible to get your own Rust server up and running.
Rust is a popular multiplayer video game where players must collect resources and build shelters to survive in a harsh environment. This allows enthusiasts to take their experience further by creating a dedicated Rust server to tailor their play style and start a community.
This article will provide the steps necessary to host a Rust server. Whether you are a beginner or a professional, we will guide you in successfully setting up and managing your Rust server. let’s get started.
Rust Server Prerequisites
Here’s what you need before setting up a Rust game server:
- Operating System – Windows, Linux, or MacOS. We recommend a Linux-based operating system to host a Rust server due to its stability and efficiency.
- CPU – At least a quad-core processor. The 6-core processor is ideal for large servers.
- RAM – at least 8 GB. 16GB is recommended to host more players.
- Storage – Minimum 20 GB. More disk space may be required as your server grows.
- Internet Connection – Minimum 100 Mbps. A stable and fast connection is essential to handle seamless gameplay and multiple player connections.
How to Host a Rust Server
After covering all the Rust server requirements, let’s now focus on the Rust server setup tutorial:
1. Choose the Right Virtual Private Server
It is important to select an appropriate Virtual Private Server (VPS) to host the new Rust server. A VPS will be a dedicated server where your Rust game environment resides, so it is important to choose the right hosting provider.
Hostinger’s Minecraft hosting plans are an excellent alternative to Rust servers, providing reliability, performance, and scalability for an enjoyable gaming experience. Although designed for Minecraft, these plans fully support other games, including Rust.
As one of the top VPS providers, Hostinger plans offer a variety of benefits:
- Premium Hardware – Hostinger’s Minecraft VPS uses industry-standard Intel Xeon processors and SSD storage, ensuring fast and lag-free performance for Rust servers.
- Multiple Server Locations – With servers in different locations, Hostinger ensures low latency, which is important for Rust gaming experiences.
- Quick Setup – With onboarding taking less than 5 minutes, your VPS can be up and running in no time.
- Customization and Control – Full root access for modding Rust servers and installing plugins provides extensive customization and control over your Rust Server environment.
- Strong AI Assistant – Hostinger’s VPS includes an AI Assistant feature that provides guided assistance, scripts, and commands tailored to your needs.
- Affordable and Scalable Plans – Starting at just $6.99/month, Hostinger’s Minecraft VPS plans are scalable to meet the growing needs of your Rust server.
2. Set Up Your VPS
Hosting a Rust server on a Linux VPS is simple with Hostinger. Here’s how to get started with our VPS for Rust:
- Choose a Minecraft hosting plan based on your server size and player count. Complete the registration and checkout process.
- Once done, access your VPS dashboard. Here, you will find the option to set up your new VPS plan. Click on Setup to proceed.
- During setup, you’ll be prompted to choose your server name, set a secure password, and select a data center location nearest to most of your players.
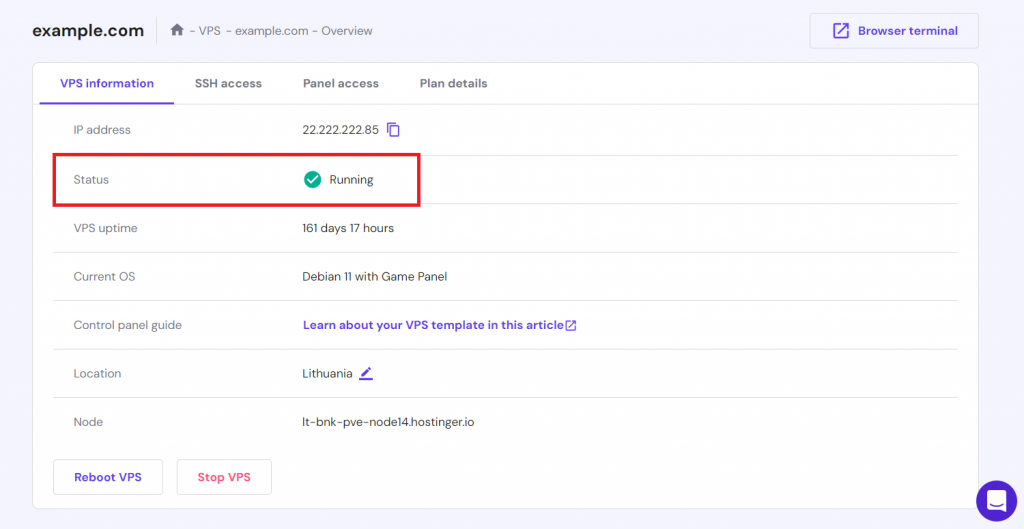
- After setup, verify that your VPS is running by accessing the VPS information tab within the VPS dashboard. If it’s offline, click Start to initiate it.
- Navigate to the SSH access tab to find the details needed to access your server.
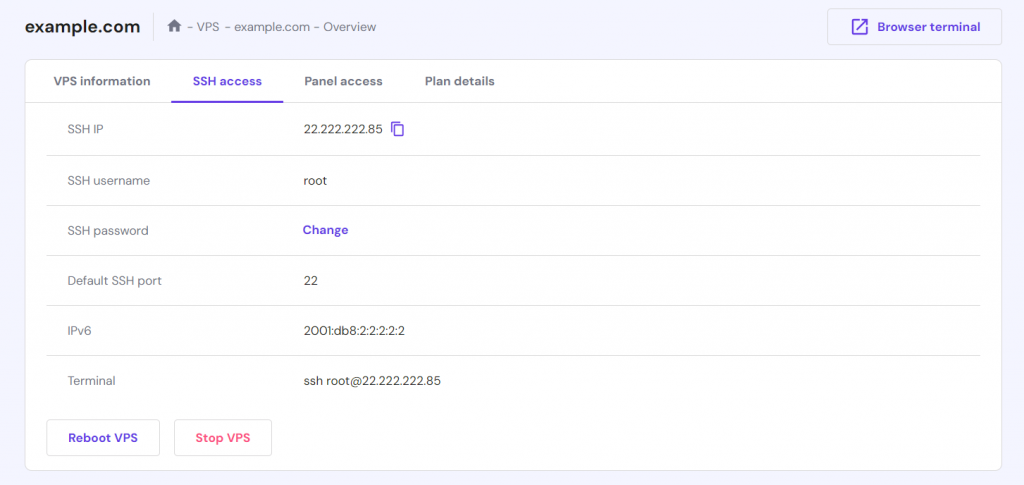
- Open a server connection window through the command line or an SSH client like PuTTY.
- Once connected, update your Linux packages to ensure your server is up-to-date. This secures your server and improves its performance. Execute the following Linux command:
sudo apt update && sudo apt upgrade
3. Install the Rust Server
With your VPS ready, the next step is installing the Rust dedicated server. Follow the instructions below:
- Install SteamCMD, the command-line version of the Steam client for installing and updating server files for games like Rust. Run:
sudo apt install steamcmd
- Install necessary dependencies such as screen or tmux to run server processes in the background. Use the command:
sudo apt-get install screen tmux
- Create a specific directory for your Rust server files by executing the command below:
mkdir rust_server
- Within the desired server folder, use SteamCMD to download the server files with the command:
steamcmd + login unknown + force_install_dir ./rust_server + app_update 258550 + quit
This command lets you log into SteamCMD, define a dedicated Rust server folder, and download the necessary server files. Number 258550 is the Steam app ID for Rust.
After installation, the rust_server directory will be the file location for all Rust Server files. Visit this Rust server folder whenever you need to access your files.
4. Modify Server Settings
After successfully installing the Rust server, you can configure the game server to match your preferences and needs. To get started, go to your Rust installation directory using the command:cdust_server
The primary configuration file within this folder is usually named server.cfg. Open it using the nano text editor: nanoserver.cfg
This file contains various settings you can modify, such as:
Server Name and Description
Assign a unique name to your server using the line: server.hostname “Your server name”
To add a server description that outlines your server’s theme or rules, include the following: server.description “Your Server Description”
Map Type
Select the type of map you want to use by modifying the line:server.level “Procedural Map”
The many map types you can use include:
- Procedural Maps – Randomly generated scenarios, providing a unique experience in every game.
- Barren – Focusing on less detailed, simpler terrain for better performance.
- Happy Island – A fixed layout with consistent features for predictable gameplay.
- Savas Island – A smaller, more combat-focused map, ideal for faster and more intense matches.
- Custom Maps – Created by the community for modified servers, these maps offer diverse and unique designs.
Server Port
Make sure the server port is set correctly for players to connect by including the following
The default port for Rust game traffic is 28015. For the RCON (remote console) protocol, it is 28016.
Additionally, port forwarding on your network is important to allow external connections to your server, such as those from the local network.
For Rust, this typically involves configuring your router to forward TCP port 28015, ensuring players can connect to your server from outside your network.
Player Slots
Define the maximum number of players that can join your server with:server.maxplayers 50
Game Mode
Set the game mode to your liking: using server.pve true
Here are several game mode options to use:
- PvE (Player vs. Environment) – set to true for a survival-focused mode with limited or no player combat.
- PvP (Player vs. Player) – set to false for traditional Rust gameplay emphasizing player conflict and strategy.
- Softcore – set to [appropriate command], which reduces death penalties and is suitable for a less intense experience.
- Hardcore – set to [appropriate command], increasing difficulty and survival challenges for experienced players.
Once softcore and hardcore modes are confirmed, replace [appropriate command] with the actual command. These commands may vary and may require specific Rust server configuration to implement.
Other Advanced Settings
Adjust crafting speed with: crafting.instant true
Set the day and night cycle with: env.daylength 45
Set the rate at which players gather resources with dispenser 2:gather.rate
Configure which loot appears in the game using the various loot configuration lines.
After making changes, press CTRL + X → Y to save, then press Enter to exit the editor.
Then, restart your server for the changes to take effect by accessing Hostinger’s VPS dashboard and clicking Reboot VPS.

This method is used because Rust doesn’t provide a dedicated restart command within the command prompt.
5. Launch the Rust Server
Now that your own Rust server is configured, it’s time to launch it and explore the gameplay you’ve created. Make sure you are in your server directory, then start the Rust server with the following command: ./RustDedicated -batchmode
If you want to customize the game settings when starting, use this command instead:./RustDedicated -batchmode +server.port 28015 +server.level “Procedural Map” +server.maxplayers 100 +server.hostname ” Your Server Name” +server .Identity “Your_Server_Identity”
This startup script starts the Rust server process with parameters such as port, map type, maximum players, server name, and a unique server identification.
After your server starts, monitor the server console for errors or warnings. This is important for troubleshooting Rust server issues during startup. In particular, pay attention to messages related to server initialization, network connectivity, and script execution.
Additionally, check the presence of your running server in the client-server list to confirm successful startup.
You can also test connectivity to your server using the Rust client from your PC. Enter the IP address and port of your VPS in this format: connect 123.456.78.90:28015
Remember to replace 123.456.78.90 with your server’s actual IP address.
6. Manage and Maintain the Rust Server
Effective management and maintenance of your private Rust server is vital for a stable and enjoyable gaming experience. Here are some Rust server management tips for smooth server operation:
Server Backup and Maintenance
Back up your server files regularly to prevent data loss. Using the best VPS like Hostinger for Rust Server hosting streamlines the backup process.
With Hostinger, your servers are automatically backed up weekly. For more frequent backups, choose the upgrade option. To perform a manual backup instead, use Create snapshot.
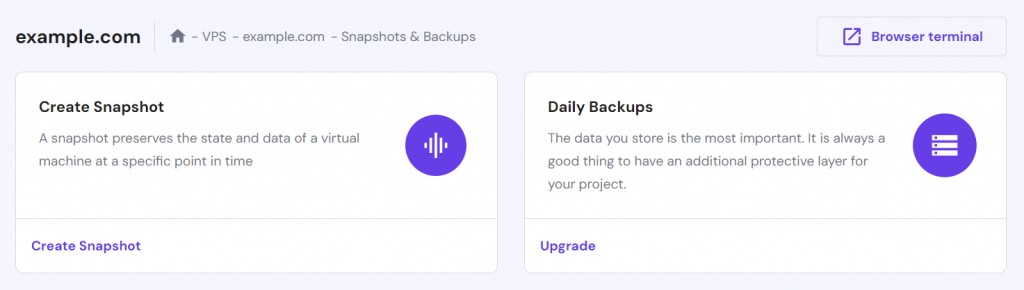
These features are accessible in your VPS dashboard under Backup and Monitoring → Snapshots and Backups.
Rust Server Performance Optimization
Monitoring and optimizing server performance is essential. Use Rust-specific tools and plugins to track performance, resource usage, and player activity.
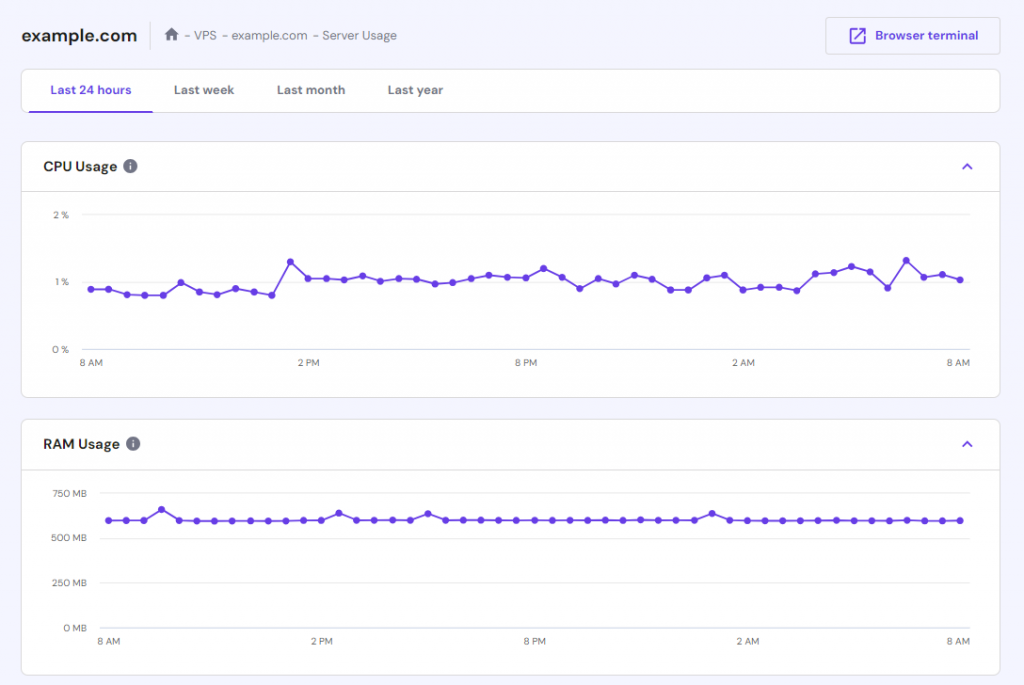
Hostinger customers can access the Server Usage option for information on CPU usage, RAM usage, disk space and traffic data, with statistics available for various time ranges.
You can also consider using plugins like BattleMetrics or RustAdmin to further optimize and prevent crashes.
Player Management
As a server owner, it is important to regularly communicate with your player community to address their concerns or feedback. Use server admin commands to adjust map and world settings and PvP/PvE options to ensure engaging and fair gameplay.
Employing users’ command options is essential to maintaining a positive gaming environment based on community feedback and needs. These include kicking user to manage player behaviour, or banning user for more serious offences.
Community Building
Foster a positive community by setting clear rules, moderating effectively, and encouraging interaction with players. Regular events or challenges can also significantly increase player engagement.
Also, maintain open lines of communication with your players through forums or chat groups. Implementing player recognition programs or community feedback sessions can also contribute to a vibrant and active gaming community.
Server Wipes and Updates
Regular server wipes help maintain balance and refresh the gameplay experience. Save the current settings with server.writecfg before executing wipes and transmitting the server wipe schedule to your community.
Additionally, make sure your dedicated server is updated with the latest Rust version for better security, better performance, and new features. Run commands like update_oxide or app_update 258550 to update.
Batch File Configuration
For more efficient server administration, consider installing batch script files. These scripts can automate tasks such as server startup, updates, and backups. Create these scripts using a text editor and save them in your server directory.
For example, a simple batch script file to start the server might look like this: #!/bin/bash ./RustDedicated -batchmode +server.port 28015 +server.level “Procedural Map” +server.maxplayers 100 + server.hostname “Your server name”
A server update batch file could be: #!/bin/bash Steamcmd +login anonymous +force_install_dir ./rust_server +app_update 258550 +quit
For backup, a batch script could be: #!/bin/bash tar -czvfrust-server-backup.tar.gz /path/to/rust_server/
Make them executable with chmod +xscriptname.sh, and run from the command line as needed.
Conclusion
In this guide, we’ve covered the essential steps of building a Rust server, from choosing a robust VPS to its final launch. You are now ready to manage your Rust private server, optimize its performance, and build a gaming community.
Regular maintenance and updates are important to provide an optimal server experience. Whether you’re hosting a private server for friends or a large audience, the knowledge you’ve gained here will set up an exceptional gameplay experience.
Now, it’s time to enjoy the unique world you have created on your private server. Have fun playing!