OpenAI’s Generative Pre-trained Transformer (GPT) language model helps simplify various tasks, including aiding application development like GitHub Copilot. Auto-GPT is one of many tools that use the technology.
Auto-GPT is a general-purpose, autonomous Artificial General Intelligence (AGI). Unlike ChatGPT, it automatically breaks down tasks and gives follow-up prompts until the goal is achieved with minimal human intervention.
To use the tool, users need to configure it using Git and the API. This tutorial will explain how to install Auto-GPT on a Virtual Private Server (VPS) and share its best practices.
What Is Auto-GPT?
Auto-GPT is a general-purpose, autonomous AI agent based on OpenAI’s GPT large language model. Unlike other AI models, it can automatically generate follow-up prompts to complete tasks with minimal human interaction. Auto-GPT helps simplify various tasks including application development and data analysis. To use the tool, users need to clone the Git repository and integrate the OpenAI API.
Prerequisites for Installing Auto-GPT
To host and run Auto-GPT in a production environment you need a VPS hosting plan. The tool does not require much computing power, but your server must be compatible with various software, such as:
- Python and pip. The programming language lets your system run Auto-GPT code, while the package manager allows you to install and manage the dependencies.
- Git. This version control system fetches the Auto-GPT files and code from the repository during installation.
- Docker. This tool packages Auto-GPT with its dependencies and libraries as a container, which helps simplify the testing and deployment process.
In addition to supporting all the necessary software, Hostinger’s VPS hosting service provides full root access to avoid permission-related issues during installation and configuration.
We also provide an AI Assistant tool that helps generate Linux commands, which you can run on your server remotely using our browser terminal. Plus, we provide templates to install various Linux distributions and applications in one click.
After purchasing and installing a VPS plan from Hostinger, connect using an SSH client like PuTTY, Terminal, or our browser terminal. Find the login credentials in the SSH Access tab of your VPS overview menu in hPanel.
Once connected, update your system’s package manager. The commands vary depending on your operating system. For Debian, Ubuntu, and other derivatives, run: sudo apt update && sudo apt upgrade
For CentOS, AlmaLinux, and other Red Hat Enterprise Linux (RHEL) derivatives, use the following commands: sudo yum update && sudo yum upgrade
Important! To deploy Auto-GPT on Windows, you can install the required software using executable files or the command prompt. We recommend configuring a code editor like VSCode for local computers to easily modify the file.
How to Install Auto-GPT
After preparing your server, follow these steps to install Auto-GPT on your VPS. Since we will be using Ubuntu 22.04, modify the commands as necessary according to your operating system.
1. Install Python and Git
Run the following command to install the Python programming language and the pip package manager: sudo apt install Python3 Python3-pip
Check if Python and pip are configured correctly in your computer by using this command: Python3 –version pip3 –version
Make sure you install Python version 3.8 or later to meet the minimum requirements. Otherwise, download the latest stable release using wget: sudo wget
Before installing Python, download all dependencies using the following command: sudo apt install build-essential zlib1g-dev libncurses5-dev libgdbm-dev libnss3-dev libssl-dev libreadline-dev libffi-dev
Extract and install Python by running these commands sequentially: tar -xzvf Python-3.12.0.tgz cd Python-3.12.0 ./configure make sudo make install
Set up the git version system to auto-fetch the GPT repository. Here is the command: sudo apt install git
Verify Git installation with this command: git -version

2. Get the Auto-GPT Repository
You can get auto-GPT files and code from the repository using Git or manually. We will explain both so that you can choose based on your preferences.
Cloning the repository via Git
Download auto-gpt by cloning the repository contents using the git command: sudo git clone
This will automatically create AutoGPT folder containing all recovered files in your current directory.
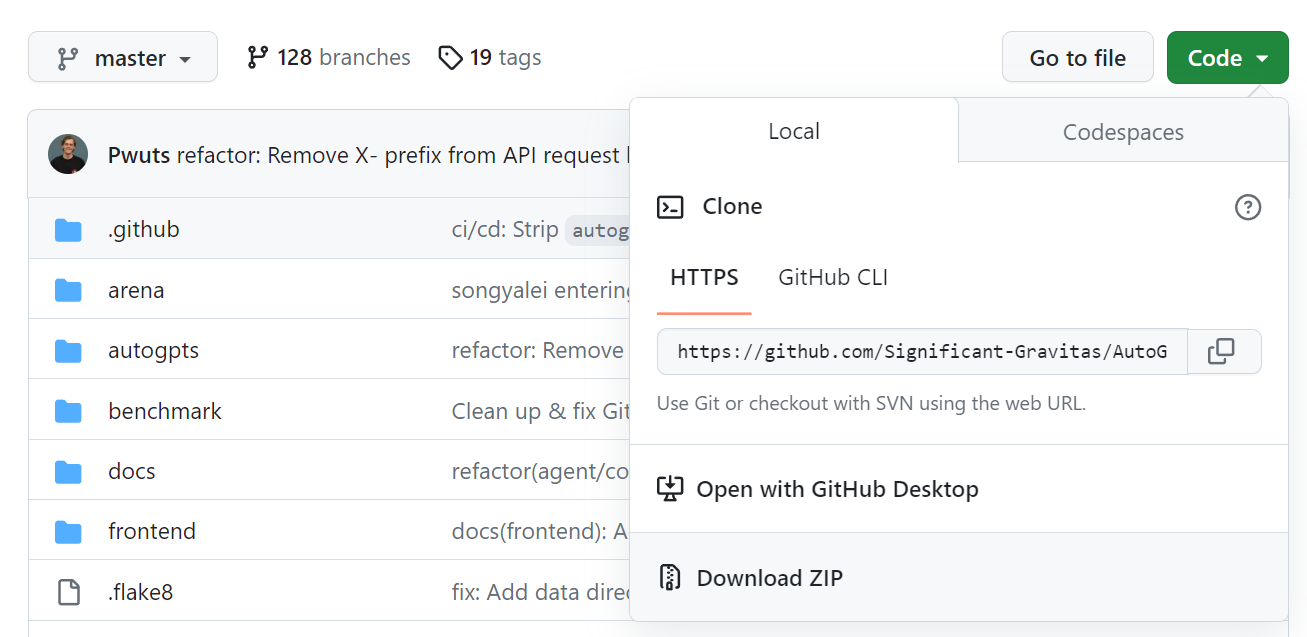
Downloading the repository as a zip file
If you want to upload files manually, open the Auto-GPT official repository on your web browser. Click on the code button and select download zip.
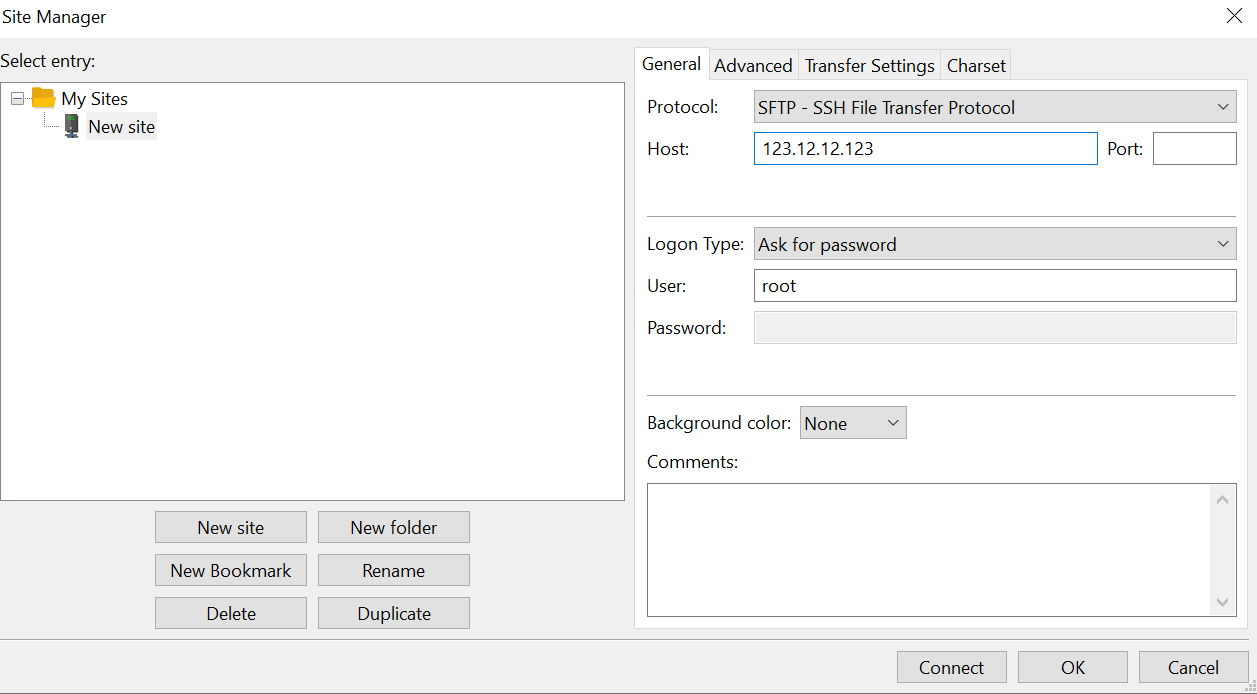
Upload the archive file from your local computer to the remote VPS. For simplicity, we will use Secure File Transfer Protocol (SFTP). Here are the steps:
- Download and install the FileZilla client.
- Open the application, then go to Files → Site Manager → New Site.
- Choose SFTP as the protocol and enter all the required information. Click Connect.
- Locate the archive file in your local computer’s download directory. Drag and drop it to the right-hand window.
3. Install the Required Packages
Auto-GPT requirements include various Python packages. Instead of installing them separately, call the require.txt file to automatically configure all dependencies: pip install -r docs/requirements.txt
Make sure to change your working directory to /AutoGPT. If you encounter permission issues, run the command as sudo and add the –user option: sudo pip install –user -r docs/requirements.txt
Important! If it still doesn’t work you can add the -break-system-package option. However, keep in mind that this may break the pipe installation.
4. Set Up the OpenAI API Key
Use the OpenAI API key to connect Auto-GPT with the GPT large language model (LLM). Here’s how to do it:
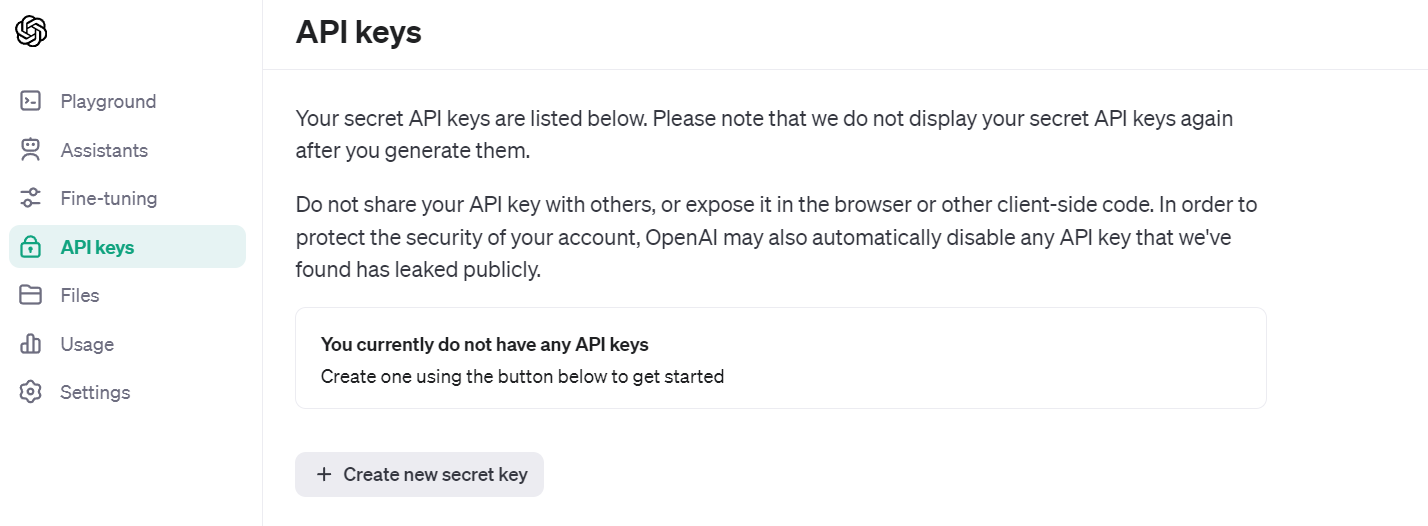
- Make a new account on the OpenAI login page. Skip this step if you have one already.
- Go to the OpenAI API key generation page. Click Create new secret key.
- Enter a name and press the Create secret key.
- Copy the secret key and store it in a safe location since you won’t be able to view it again. Click Done.
Navigate to AutoGPT/autogpts/autogpt and follow these steps to put the API key in Auto-GPT’s .env file:
- Rename the .env.template file to activate it:
sudo mv .env.template .env
- Open the file using a text editor like nano:
sudo nano .env
- Enter your API key in the OPEN_API_KEY variable. It will look like this:
OPEN_API_KEY=abcdef12345
- Press Ctrl + X, Y, and Enter to save the changes.
You can also determine the LLM model for different tasks. To do so, change the SMART_LLM and FAST_LLM values to GPT 3.5 or 4 in the .env file.
5. Start Auto-GPT
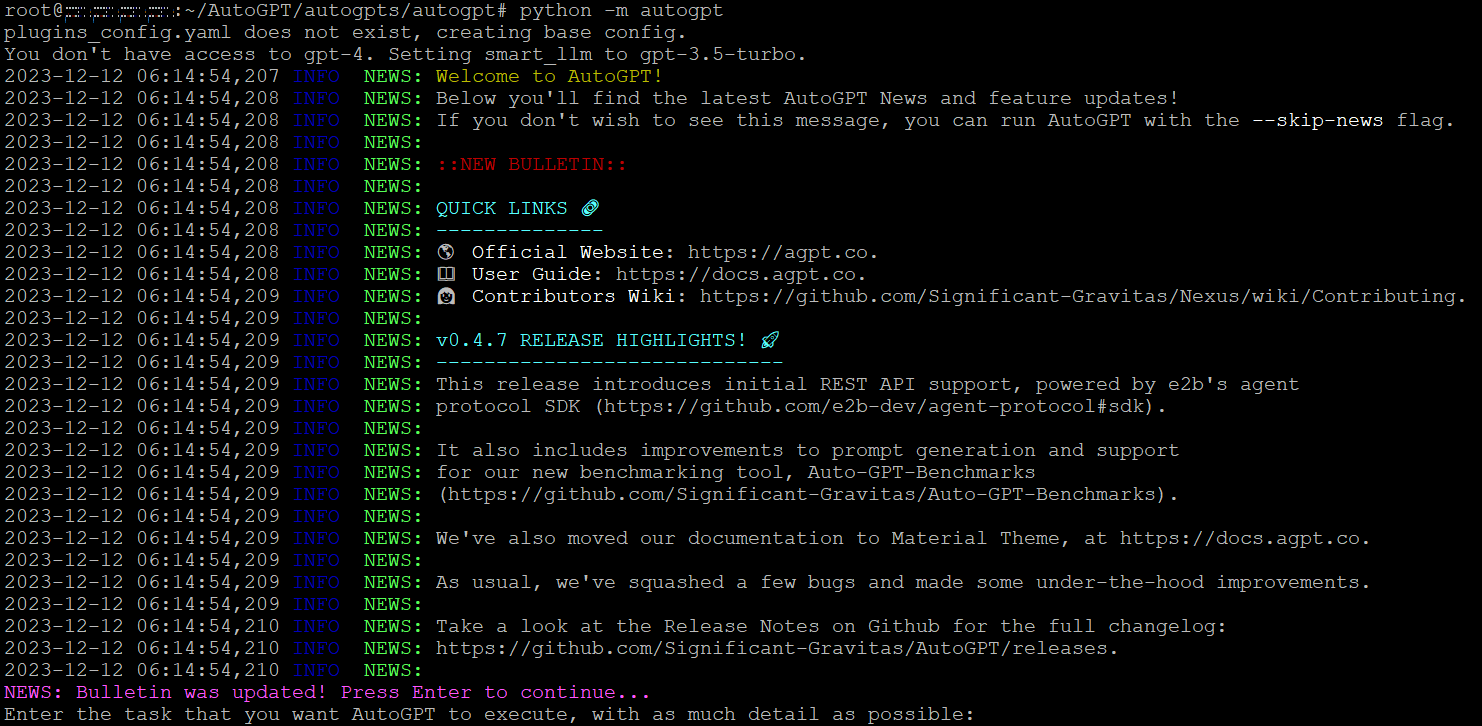
To start the AI tool, navigate to AutoGPT/autogpts/autogpt and enter this command in your command-line interface: python -m autogpt
Once you see the welcome message, press Enter to start using the tool.
6. Setup Docker (Optional)
Use Docker to install auto-gpt in an isolated, portable environment. This provides a more reliable way to run tools in the background than a multiplexer like Linux Screen.
After installing Docker on your Ubuntu system, build a Docker image for your project using this command: docker build -t autogpt.
Run the auto-gpt container using the command below: docker run -it –env-file=./.env -v $PWD/auto_gpt_workspace:/app/auto_gpt_workspace autogpt

Alternatively, if you have already installed Docker Compose use these commands: docker-compose build auto-gpt docker-compose run –build –rm auto-gpt
Troubleshooting Auto-GPT Installation Issues
In this section, we will explore several common Auto-GPT installation issues and their solutions.
Missing Modules
If you can’t run auto-gpt and the terminal shows a missing module, check if you’re in the right directory. You need to run the command within the AutoGPT/autogpts/autogpt source code folder.
Also, this can happen if you misconfigure dependencies. To resolve this, reinstall the required packages using the pip install -r requirements command.
If other modules are missing, install them using Poetry. After navigating to the root auto-gpt folder, run the following command: pip install poetry export -f requirements.txt -o requirements.txt – without-hash pip install -r requirements.txt
Then, use pip to install all missing modules based on your errors. For example, if the terminal shows that auto-gpt does not have a plugin template, enter: pip install auto_gpt_plugin_template
In the meantime, if you encounter a missing Git module error, run this command: pip install gitpython
Missing auto-gpt.json
The auto-gpt installation process should automatically create an auto-gpt.json file. However, if it is not present, your command-line interface will return an error as the tool fails to store the data.
The simplest way to fix this is to manually create a file within the auto-gpt root folder using this command: sudo Touch auto-gpt.json
API Connection Errors
Misconfigured API keys can cause bad gateway errors. If you don’t have free tokens, make sure you’ve set up your payment method and billing details in OpenAPI. Otherwise, Auto-GPT will not be able to connect to the GPT LLM, preventing it from processing your signals.
If you encounter an invalid key error despite properly configuring the API in .env, try putting the key in Auto-GPT’s configuration file. To do this, enter the key directly into the config.py file within the Auto-GPT/autogpt/config path.
How to Use Auto-GPT
Once Auto-GPT is running, describe your task, and the tool will assign an AI agent with specific roles and goals.
For example, if you ask Auto-GPT to “write content for an article about AI,” it will assign EditorGPT, whose role is to help writers create high-quality content. You can also enter various AI prompts for VPS management to generate instructions for server administration.
Enter follow-up or confirmation input based on instructions, which may vary depending on the agent. For new Auto-GPT users, we recommend reading our AI Prompt engineering tutorial.
For specific tasks, you can add the following options to the Python command to run auto-gpt:
- –speak. The agent will provide an audio output using text-to-speech.
- –continous. Auto-GPT will run the task autonomously without user authorization.
- –self-feedback. The tool will automatically provide feedback by verifying its actions based on the task.
Auto-GPT does not recommend using the –continuous and –self-feedback options as they may lead to unexpected behavior.
Additionally, you’ll need to configure additional API keys for tasks beyond text generation. For example, integrate Dall-E for drawing images and ElevenLabs for text-to-speech functionality.
Auto-GPT Best Practices
In this section, we will explain Auto-GPT best practices to help you understand how to efficiently use AI technology in your website or application development.
Configure Auto-GPT for Specific Tasks
Customizing Auto-GPT settings lets you configure the tool specifically for your task. You can set the agent’s role, name, and goal in the YAML file.
This file lets you run AI tools continuously for specific tasks without specifying roles and purpose again and again. For example, we will create a writing agent configuration: nanowriter_ai_settings.yaml
Enter the AI’s name, role, and goal. These vary depending on your tasks. Here’s an example: ai_name: WriterGPT ai_role: An AI assistant designed to research and write an engaging article to engage readers. ai_goals:- Research the content of the article to ensure validity. – Create article structure. – Write engaging written content for a website to attract readers.
To apply the configuration, call the file using the –ai-settings option when running autogpt: Python -m autogpt –ai-settings Writer_ai_settings.yaml
To set a file as the default, enter its name in the AI_SETTINGS_FILE variable of the .env file. You can also set up the prompt configuration by creating a similar file and calling it in your command using the -prompt-settings option.
Use Custom Scripting for Enhanced Functionality
Extend Auto-GPT features and data sources using custom scripts called plugins. For example, you can install the Wikipedia plugin to enable tools to retrieve data from the website.
It is possible to create your own using the init.py template or install a pre-configured plugin from their repository. Since configuration steps vary slightly depending on the plugin, be sure to check the instruction manual.
Typically, you need to extract the files to Auto-GPT’s plugins folder and add the plugin to the .env file.
Optimize Memory Usage for Handling Large Datasets
Users can cache historical Auto-GPT interactions to optimize data management and enable adaptive quick creation based on context. For low-performance systems, this helps AI tools run better when handling complex tasks.
A popular way to do this is to install the Pinecone Vector Database using the API. Alternatively, you can use Redis, which is included with auto-gpt when you install the tool using Docker Compose.
To set this up, run this command to create a Redis container: docker run -d –name redis-stack-server -p 6379:6379 redis/redis-stack-server:latest
Enter the following settings in the .env file. Replace the password with your password: MEMORY_BACKEND=redis REDIS_HOST=localhost REDIS_PORT=6379 REDIS_PASSWORD=’PASSWORD’
Integrate Auto-GPT With Other APIs
Integrating Auto-GPT with other platforms lets you expand the functionality of the tool. For example, you can enable image generation in AI tools using Dall-E or Stable Diffusion.
In the meantime, use the ElevenLabs or Microsoft Azure text-to-speech API to enable voice output. For automatic speech transcription, use the hugging face.
If you want to simplify AI application development, integrate Auto-GPT with Langchain. To use these tools, retrieve their API keys from the respective websites and put them in the .env file.
Conclusion
Auto-GPT is a general-purpose, autonomous AI agent for various tasks such as application development and data analysis.
In this Auto-GPT installation guide, we have explained the steps to install the tool in a VPS environment:
- Install Python and Git. Download the latest version of Python and Git using your operating system’s package manager command, like apt or yum.
- Download the Auto-GPT repository. Duplicate the official Auto-GPT repository using the git clone command or by uploading the ZIP file via SFTP.
- Install the dependencies. Run the pip install command to download and install the packages listed in the requirements.txt file.
- Set up the OpenAI API. Create a new OpenAI account and generate an API key. Rename the .env.template file and enter your secret key using a text editor.
- Start Auto-GPT. Enter the python -m autogpt command to launch Auto-GPT.
- Set up Docker. Install Docker, create a Docker image, and run the Auto-GPT service container.
If you encounter an error, make sure you have the auto-gpt.json file and all dependencies. Also, check if the Python command runs within the root auto-gpt folder.
To use the tool efficiently, store the agent configuration in a YAML file, integrate other tools with API keys, and install plugins according to your tasks. Also, configure Pinecone or Redis for auto-GPT performance optimization.
How to Install Auto-GPT FAQ
In this section, we will answer several common questions about installing Auto-GPT on a production computer.
Can You Use Auto-GPT for Free?
While Auto-GPT is free and open-source, OpenAPI charges you for each API call and word input. For example, GPT 3.5 Turbo Input costs $0.0010 for 1,000 tokens or about 750 words. For more information, see the OpenAI pricing page.
What Are the Future Trends for Auto-GPT?
Auto-GPT API integration and learning capabilities make the tool versatile, allowing you to automate tasks from start to finish.
In the future, it may develop another AI application with the Langchain framework. Also, it can help users resolve live support calls by providing solutions in text-to-speech.
What Are the Limitations of Auto-GPT?
Auto-GPT cannot convert a series of actions into reusable functions. This results in inefficiency when the user wants to restart his task from the beginning.
It also inherits GPT LLM limitations. For example, GPT 3.5 has the potential to generate misinformation and can only collect information until January 2022.